_______________________________________________________________________________ Don't Forget: As an Affiliate, I Earn from Qualifying Purchases. If you click on any Amazon, Chewy, Walmart, or other links on my site and make a purchase through those companies, I may receive a small percentage of that sale at no extra cost to you. This helps me pay for the upkeep and maintenance of my site. You'll also notice advertisements on my site, which help contribute to the costs of running the site. _______________________________________________________________________________
Installation Of The Nexar HaloCam Dash Cam
For me, the hardest part about the installation of the HaloCam was taking the pictures. If I didn’t have to take and edit all of the pictures, the whole installation would’ve taken no more than 10 minutes.
The installation of the dash cam was pretty straightforward; quick and easy. I just identified a place where I wanted it (right below my rearview mirror), cleaned the windshield in that area with some rubbing alcohol and then stuck the mount on using the adhesive that’s on the mount.
The thing that I don’t like about the mount is that it’s stuck to the windshield using an adhesive disc and not a suction cup for easy removals. Yes, the mount has a clip to detach the camera; but the holder is still attached to the windshield and so you’re unable to move it around or move it to another vehicle without having to pull really hard to get it un-stuck from the windshield.
I’m not sure how long the adhesive lasts and how many ‘tries’ you get with it, but I don’t really see it lasting too long if you keep removing it. They include an additional adhesive pad in the box just in case the other one looses its adhesion.
One of the pros that I liked about using the Nexar App was not having to worry about wires if your phone has enough charge; well the HaloCam needs a constant power source in order to work and that means the wire is going to hang down if you don’t tuck it away into the cracks around the inside of your vehicle.
For the time being, I have the wire for the dash cam wrapped around the passenger visor and then coming down into the USB charger. If I continue to use the camera, I will route the wire the correct way to make it more visually appealing and prevent any mishaps with the wire. I just want to make sure I like the placement of the camera before I commit.
Below are pictures of the dash cam viewed from outside the vehicle. As you can see, it’s pretty obscure and doesn’t take up a lot of footprint. It doesn’t affect my line of sight either.
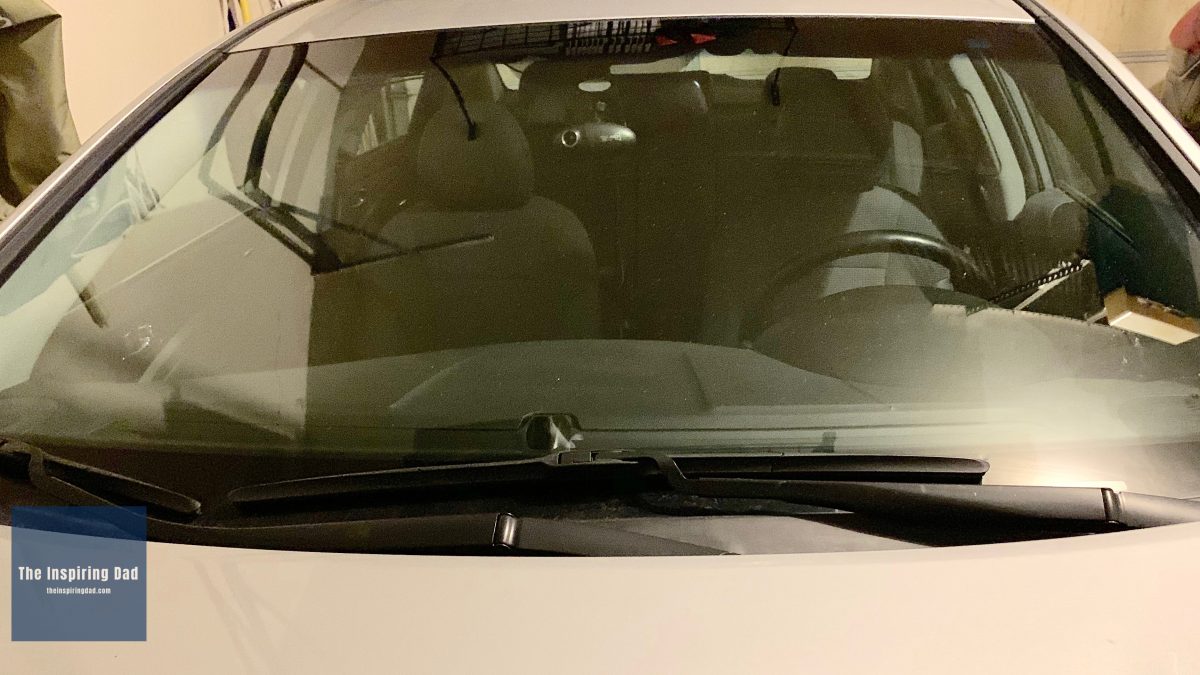
Outside View Of Nexar HaloCam 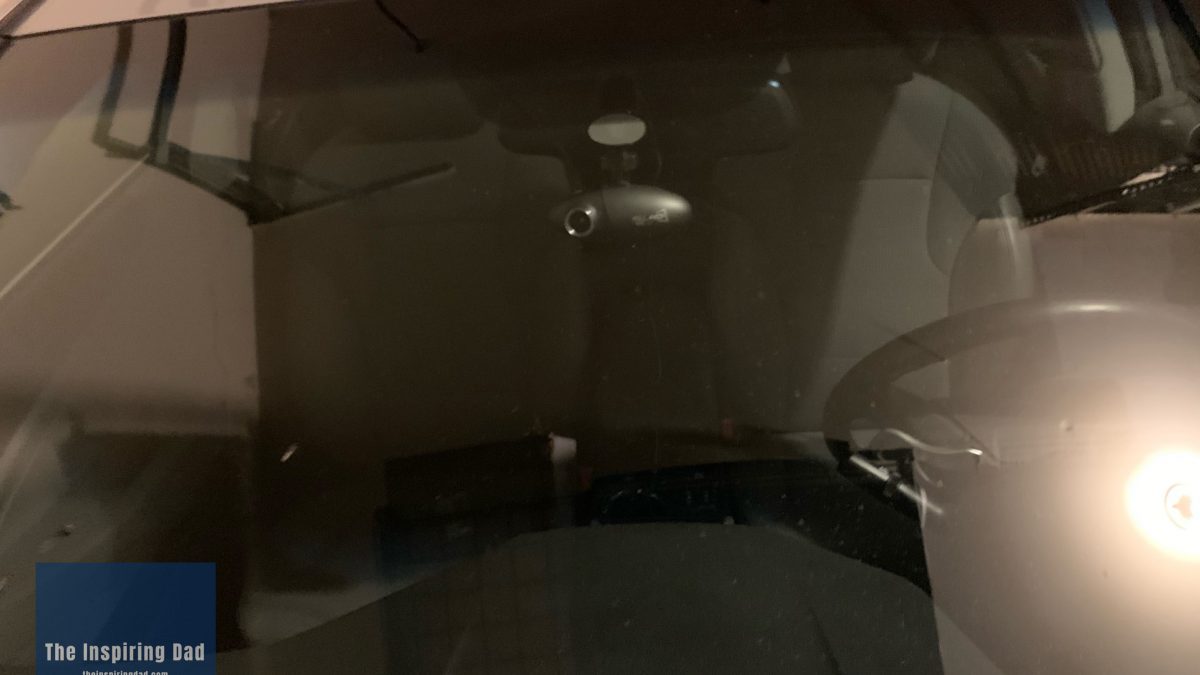
Closer View of Dash Cam 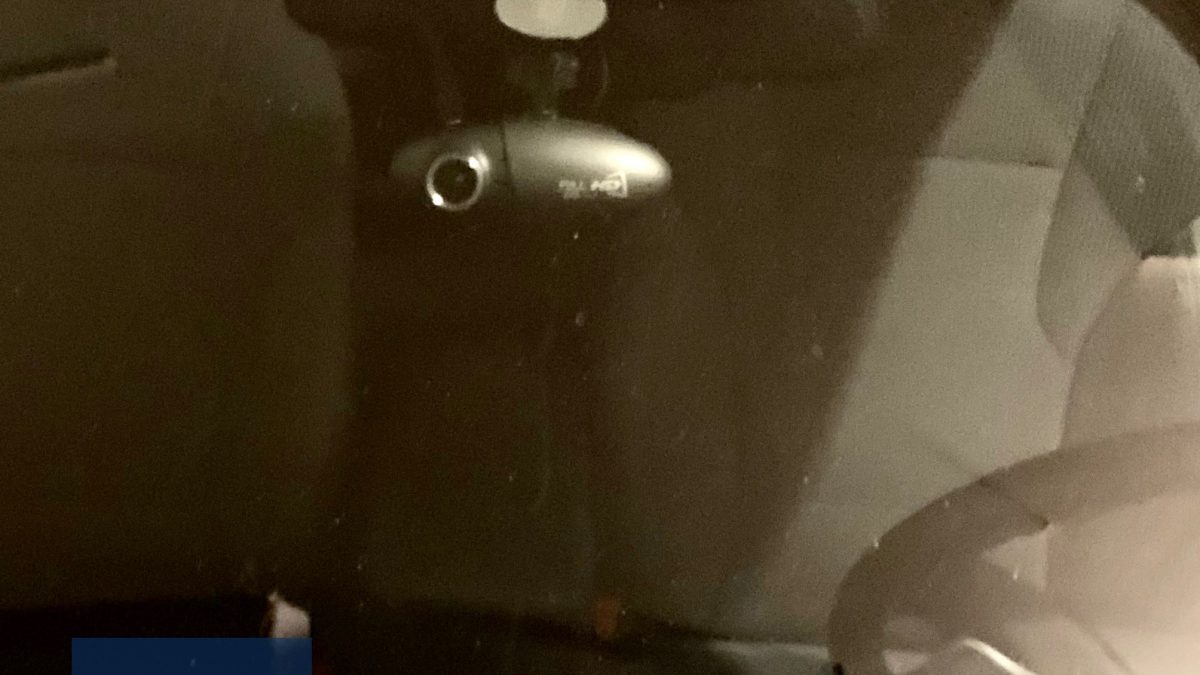
Closer, Closer view of Dash Cam
Your right on the app requiring “always on” to auto-record but also if you have “background app refresh” on it still auto-records in the background without the app being up, just as long as you do not close out the app entirely and it’s running somewhere in the background.
[…] you think you’re better off with an actual dash cam, check out my review of the Nexar HaloCam and see if that will be a better alternative than a dash cam […]