_______________________________________________________________________________ Don't Forget: As an Affiliate, I Earn from Qualifying Purchases. If you click on any Amazon, Chewy, Walmart, or other links on my site and make a purchase through those companies, I may receive a small percentage of that sale at no extra cost to you. This helps me pay for the upkeep and maintenance of my site. You'll also notice advertisements on my site, which help contribute to the costs of running the site. _______________________________________________________________________________
Introduction
Cold brew coffee has taken the coffee world by storm, and rightfully so. What used to be a niche obsession has now become a staple in cafés and households alike. But why pay for something you can master at home? I’m not talking about your ordinary iced coffee; this is the smoother, richer, and far more nuanced cousin—cold brew.
Stick with me, and I’ll walk you through making perfect cold brew coffee at home in a pitcher and in 10 easy steps, that’ll make you question every dollar you’ve ever spent at a coffee shop!
Cold Brew vs Iced Coffee
Before we continue, let’s talk about Cold Brew and Iced Coffee. One common misconception is that cold brew and iced coffee are the same thing, just served in a glass filled with ice. Let me set the record straight: they are not the same, and here’s why. Iced coffee is essentially regular coffee brewed hot and then cooled down with ice. It’s a quicker process but tends to yield a brew that’s more acidic and less flavorful because the hot water extracts both the good and the bad elements from the coffee grounds.
Cold brew, on the other hand, is made by steeping coarsely ground coffee beans in cold water for an extended period, usually 12 to 24 hours.
This slow extraction process results in a smoother, less acidic, and more flavorful concentrate. When you’re sipping cold brew, you’re enjoying the essence of the bean, extracted by time and patience, rather than heat and haste. So, the next time someone says they’re the same, you have my permission to school them.

Equipment: The All-in-One Pitcher
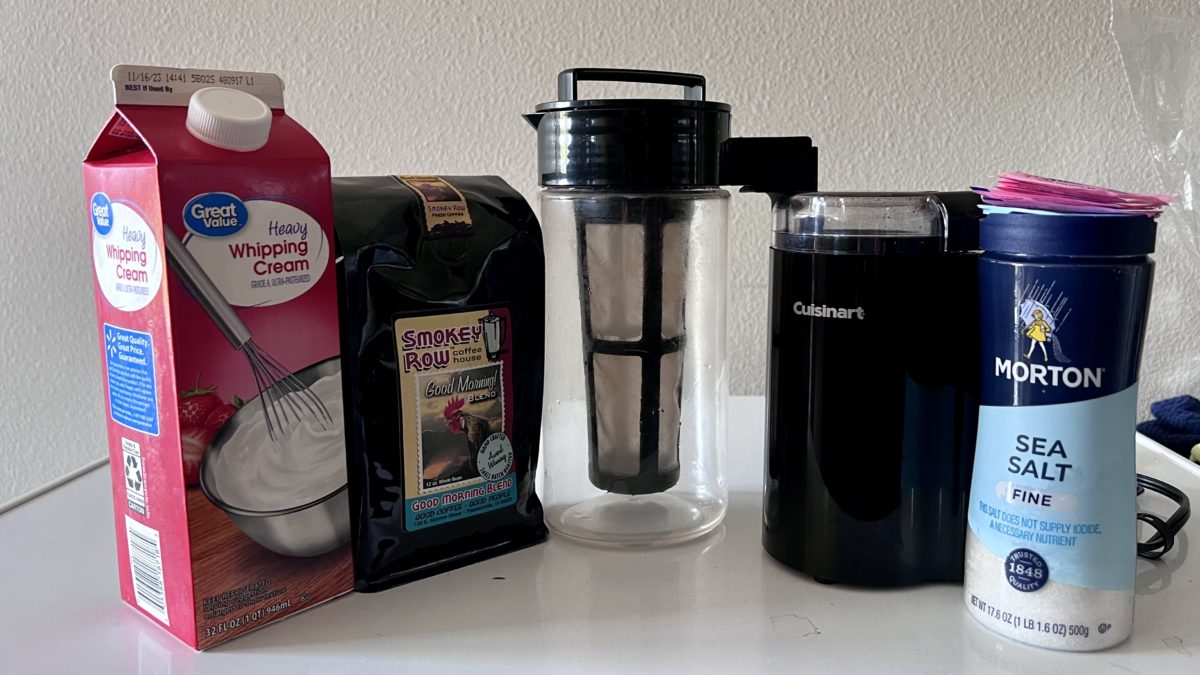
Now let’s get down to brass tacks—the equipment. You could go all fancy with separate containers, strainers, and whatnot, but why complicate life? I use an all-in-one pitcher, and it’s a game-changer.
Here’s why it’s amazing:
- Convenience: This pitcher has a filter that screws right into the lid. No need for multiple containers or a mess of a straining process.
- Efficiency: After you’ve added your coffee and water, simply screw on the lid with the attached filter, and you’re good to go. Lower this assembly into the pitcher, twist it secure, and let the magic happen.
- Waste Management: After a day or two of brewing, it’s recommended to remove the filter. Just unscrew the lid, pull out the filter, and toss those spent grounds. Couldn’t be easier.
By using an all-in-one pitcher, you eliminate multiple steps and pieces of equipment, making it foolproof for anyone diving into the world of cold brew.
10 Steps to Making Perfect Cold Brew Coffee at Home
1. Room Temperature Is Your Friend
Contrary to popular belief, using ice-cold water isn’t the best way to start your cold brew journey. Stick with room temperature water for the first 12 hours. Cold water can slow down the extraction process, leading to a less robust flavor.
2. A Pinch of Salt
This might sound odd to some, but a pinch of salt can go a long way. It helps cut the bitterness and brings out the smoother, complex flavors in your coffee. Trust me, give it a try; you’ll notice the difference. I just add a pinch to the whole pitcher and it does the job. Again, a pinch not a teaspoon.
3. Sweetening the Deal
If you’re a fan of sweet coffee, listen up! Instead of sweetening each cup individually, add your preferred sweetener into the entire pitcher. I went from using 5 packets of Sweet’N Low per day to just 5 packets for the whole pitcher, cutting back on unnecessary chemicals/sugar while keeping that sweet kick I love.
4. The Right Beans
Choosing the right coffee beans is crucial. Generally, a medium or dark roast works best for cold brew. The roast profile can greatly influence the flavor, so don’t be afraid to experiment to find what works for you.
5. Grind Your Own Beans
One of the underrated aspects of a perfect cold brew is freshly ground coffee beans. It might seem like a small thing, but grinding your own beans can make a world of difference. Pre-ground coffee often lacks the depth and nuances of freshly ground beans.
If you’re already investing in high-quality beans, take the extra step to grind them yourself right before brewing. I use a Cuisinart Coffee Grinder for grinding my beans. I buy my coffee at a local coffee shop but you can certainly get some whole bean coffee at the grocery store.
6. Coarse is the Course
When grinding your beans, aim for a coarser grind. A fine grind can over-extract during the long steeping process, leading to a brew that’s more bitter and less balanced. Coarse grounds ensure that your cold brew turns out smooth and full-bodied, just the way it should be.
7. Filter Fundamentals
Whether you’re using a dedicated cold brew maker or a simple French press, make sure to filter your coffee well. Nobody likes a mouthful of coffee grounds!
8. Counter Culture
Leave your pitcher on the counter for the first 12 hours. Not only does this continue our theme of room-temperature water, but it also allows the brew to get the kick it needs before moving it into the fridge for the remaining steeping time.
9. The Waiting Game
Patience is key. Cold brew isn’t something you can rush. Most recipes recommend a steeping time of 18-24 hours for the fullest flavor.
10. The Final Touch
Before you pour yourself a cup, give the brew a good shake in the pitcher. The flavors tend to settle, and a quick shake and mix will ensure every cup is as good as the first. I also like to stir in a little bit of heavy cream – I find it’s much better than milk or any other creamer – but that’s up to you!
Now of course you can add/omit any of the above steps and make it your own brew – but as you can see, making your own Cold Brew at home is relatively simple and you can make it as complex as you want. Whatever you decide, ensure you make it your own!
The Real Cost of Home-Made Cold Brew Vs. Store-Bought
Let’s get real about the cost of cold brew. Trust me, you’ll want to see these numbers.
At Home
- Cost of one 12-ounce bag of quality coffee beans: $13
- Total grams in the bag: 340 grams
- Grams used per pitcher (32 ounces): 60 grams
With some quick math, we can see how many pitchers one bag can yield:
Pitchers per bag: 340 grams/bag ÷ 60 grams/pitcher = ~5 pitchers (rounded down)
So, each pitcher will cost you:
Cost per pitcher: $13/bag ÷ 5 pitchers = $2.60/pitcher
And each 8-ounce glass from that pitcher comes out to:
Cost per cup: $2.60/pitcher ÷ 4 cups = $0.65/cup
At a Coffee Shop
- Average cost of an 8-ounce cold brew: $4
Monthly & Annual Comparison
At Home Per Month: $0.65 * 30 days = $19.50
At a Coffee Shop Per Month: $4 * 30 days = $120
Annual at home: $19.50 * 12 months = $234
Annual at a coffee shop: $120 * 12 months = $1,440
The Splurge Factor
Since you’re saving a boatload by making your cold brew at home (a whopping $1,206 a year!), you’ve got room to splurge. Want those artisan, ethically sourced, hand-harvested beans that cost a bit more? Go for it. With all the money you’re saving, you can afford to treat your taste buds and still come out ahead.
That’s why I buy the $13 bags of coffee – I’m still saving a lot of money at the end of the day. Sure, I could save a lot more if I were to go to national brands but for me, the fresh taste and supporting local businesses keeps me going back to the local whole bean varieties.
Do you have any tried-and-true tips of your own? Share them in the comments!


[…] brew concentrate is basically the Iron Man of coffee. It’s cold brew that’s been brewed to be super strong, way stronger than your regular cup of Joe. Think of it […]